 Bento Recipes: Sushi Tips |
|
Back to the |
|
Is sushi difficult to make? Not really. Once you get the hang of it it's quite easy. Basic stuff for making sushi:
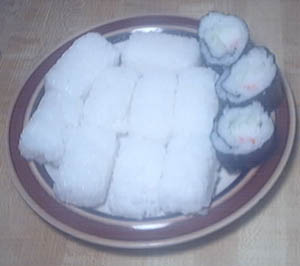
First, get some plastic wrap and cover the mat. It's inauthentic, but it keeps the mat clean. You don't want to clean sticky rice out of a bamboo mat, trust me. Lay the mat so that you can curl it towards yourself and not to the side. Then lay a strip of nori across the wrap, leaving a little space at the ends so the nori stops before the plastic wrap does on both sides. Spread the rice as thinly as you can on the nori using the rice paddle, dipping the paddle periodically in water to keep the rice from sticking to it and becoming unmanageable. (If rice sticks to your hands when you make onigiri, you can use the same trick.) Leave the bottom 1/2" of nori rice-free. From there put the fillings you want in a line down the center, and then roll the mat starting from the edge furthest away from you, spiraling it toward yourself, avoiding rolling the plastic wrap up as you do. This can be tricky at first, but you'll get the hang of it. With some water on your fingers, moisten the inner side of the nori flap that didn't get covered with rice, then stick it to the roll. This should give you a long, thin sushi log. Wrap the plastic around it as if you were going to put it in your refrigerator, tuck the ends under the log so the rice doesn't come out the sides, wrap it in the mat, and squeeze it to pack the rice. Squeeze the log into an oval, triangle, square, or whatever, if you're in that kind of mood, but don't squeeze it too hard or you'll crush the grains. You can cut the log right through the plastic wrap. Use a very sharp, nonserrated knife, and wet the blade every few cuts to keep the rice from sticking to it. To vary this, you can turn the whole thing over after you spread the rice on the nori, and put the fillings on the nori rather than the rice. When you roll it up the nori will be on the inside instead of the outside. Or you can leave the nori out entirely, but it can be difficult to spread the rice neatly enough, and rolls made this way have an annoying habit of falling apart. Another fun variation involves using rice paper, AKA spring roll wrapper, instead of nori. First, soak the rice paper, one sheet at a time, in a pan of warm water big enough to hold the whole thing. (I use a large skillet.) Push each sheet under the surface of the water and let it soak undisturbed for about 2 minutes, until pliable. These things are very fragile, and the edges will almost certainly develop small tears, but if you're careful you should be able to lift it out without those going too deep. Place it flat on a paper towel, put another towel on top, and gently press the excess water out. Then transfer it to some plastic wrap on top of a bamboo rolling mat and spread the rice on it as if it was a rectangular sheet of nori, leaving the round edges blank so you'll have an evenly-shaped roll. Then put the fillings in as you would a regular roll, then roll it up, being careful not to tear it. Note: the amounts listed are based on 1 cup (before cooking) of rice. If you cook more or less rice, or you like the flavor stronger or weaker, adjust the amounts as appropriate. Another note: It's not required to make this sushi rice for sushi. I often use plain old regular sticky rice without these seasonings. Do whichever suits your taste. 8 tsp of rice vinegar Cook the rice according to the instructions on the package. When it's done, take it off the heat and let it sit covered for 10 minutes. Mix the rice vinegar, sugar, and salt well. Put the rice in a large bowl and add the mixture, then mix it gently using a wet sushi paddle or wooden spoon. Use a fluffing motion rather than a stirring one to avoid crushing the grains. If you fan it while it cools after mixing, the rice will be glossy. |